


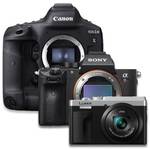


















Stop Trying to Learn Everything at Once
One of the most common things I hear from new photographers is: “I just don’t know where to start.” Modern cameras are incredible. They can track eyes, recognise subjects, shoot in near darkness and record cinema-quality video. The problem is that all this technology can make photography feel far more complicated than it actually is. When people buy a new camera, they often think they need to learn every button, every menu and every setting before they can take good photos.
You don’t. In fact, I’d argue that’s one of the fastest ways to become overwhelmed and put the camera back in the bag. The advice I give most often is simple: Learn one setting per shoot Not one setting per week. Not one setting per month. Just pick a single setting before you head out and make that the focus of your session.
Start With Aperture
If you’re learning aperture, spend the day paying attention to aperture. Watch how changing from f/1.8 to f/8 affects your image. Notice how the background changes. Look at how your subject separates from the scene. Aperture is the opening inside your lens that allows light to pass through to the camera sensor. A larger opening (represented by a smaller number like f/1.8) lets in more light and creates a shallower depth of field, meaning your subject remains sharp while the background becomes blurred. A smaller opening (represented by a larger number like f/8 or f/11) keeps more of the image in focus from front to back.


One thing worth remembering is that your equipment can influence what you’re seeing. Many cameras are sold with kit lenses that have a maximum aperture of f/4, f/5.6 or even smaller. These lenses are incredibly versatile and often represent fantastic value, but they won’t always produce the dramatic background blur you may have seen in portraits, films or professional photography. If you’re experimenting with aperture and not seeing a huge difference between shots, don’t be discouraged. Keep focusing on the relationship between aperture and your image. As your skills develop, you’ll begin to understand when a different lens might help you achieve a particular creative look.

Then Learn Shutter Speed
Once you’re comfortable with aperture, dedicate an entire shoot to shutter speed.
Shutter speed determines how long your camera sensor is exposed to light. Think of it as a curtain opening and closing in front of the sensor. The longer it stays open, the more light enters the camera.
A very fast shutter speed such as 1/1000th of a second freezes motion. This is perfect for sport, wildlife, children running around or any situation where you want crisp detail.
A slower shutter speed such as 1/30th, 1 second or even several seconds allows movement to be recorded over time. This creates motion blur and can produce some incredibly creative results.
Try experimenting with:
Cars driving past at night
Water flowing through a stream
Waves at the beach
People walking through a busy street
Light trails from traffic
Take the same scene at different shutter speeds and compare the results.
One of the biggest mistakes photographers make when learning shutter speed is accidentally moving the camera. Once your shutter speed becomes slow, even a small bump can make the entire image blurry.
Most modern cameras include built-in Wi-Fi and a companion smartphone app. Connect your camera to your phone, place the camera on a tripod or stable surface, and use your phone as a remote shutter release. This allows you to experiment with longer exposures without physically touching the camera and introducing unwanted camera shake.
You’ll quickly discover that shutter speed isn’t just about exposure—it’s also one of the most powerful creative tools in photography.


Finally, Learn ISO
The third setting to focus on is ISO.
ISO controls how sensitive your camera sensor is to light. A lower ISO setting means the sensor requires more light to create an image, while a higher ISO setting amplifies the signal from the sensor, allowing you to shoot in darker conditions.
In general, photographers try to keep ISO as low as practical because lower ISO settings typically produce the cleanest image quality with the greatest detail and colour accuracy.
For example:
ISO 100 or 200 is ideal for bright daylight.
ISO 400 to 800 is common for cloudy conditions or indoor photography.
ISO 1600, 3200 and beyond may be required for indoor events, concerts, sport or low-light photography.
The trade-off is that as ISO increases, image noise becomes more visible. Modern cameras are significantly better than they were even a few years ago, but every camera has a point where image quality begins to degrade.
A great exercise is to photograph the same scene at:
ISO 100
ISO 400
ISO 1600
ISO 6400
Then zoom in and compare the files on a computer. You’ll begin to understand how your specific camera performs and how much ISO you can comfortably use before image quality starts to suffer.
Perhaps more importantly, you’ll learn that a slightly noisy image is almost always better than missing the shot entirely.

Photography Is Learned Through Experience
What you’ll discover is that photography starts making sense much faster when you learn through experience rather than theory.
I’ve taught photography workshops for years and one thing remains consistent: the photographers who improve the quickest are rarely the ones who spend the most time reading manuals. They’re the ones who pick up their camera regularly and deliberately experiment.
Photography is a practical skill.
You can read about depth of field for hours, but you’ll understand it properly the moment you photograph the same subject at f/1.8 and then again at f/11. You can watch videos explaining shutter speed, but nothing beats seeing the difference between a cyclist photographed at 1/1000th of a second and 1/15th of a second. You can study ISO charts online, but you’ll learn far more by taking your own camera into different lighting conditions and seeing what happens.
The camera becomes less intimidating when you stop trying to master everything at once. Every photographer, regardless of experience level, learns the same way: one image at a time. So before your next shoot, ask yourself a simple question:
What’s the one thing I want to learn today?
Then spend the entire session exploring it. You’ll come home with more than just a few photos. You’ll come home with a better understanding of your camera, and that’s where confidence really begins.

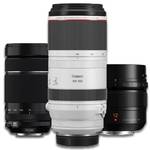
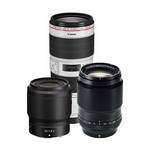
Recommended Lenses for Learning Aperture
If you’re interested in experimenting with shallow depth of field and stronger subject separation, these affordable lenses are excellent starting points.
Often referred to as a “Nifty Fifty,” these lenses became famous because they offered an affordable way to achieve a more professional look with beautiful background blur and excellent image quality.
While not every system uses an exact 50mm focal length today, the concept remains the same.


These lenses represent some of the best-value upgrades available and are often the first lens I recommend to photographers looking to better understand aperture, depth of field and creative image-making. Other than that, get shooting!