


Mobile Podcasting Setups Explained: From First Rig to Full Pro Kit
Mobile podcasting isn’t about shortcuts. It’s about picking gear that actually works, in the places podcasts actually happen.
I used to chase the “best” setup. Turns out, the best setup is the one that survives real life. Tight rooms, bad lighting, noisy air con, last-minute location changes, and the constant pressure to hit record and get something usable. That’s where mobile rigs earn their keep.
We’ve broken it down into three setups. Not just by price, but by how you work. All are portable, quick to set up, and reliable. The difference is how much control you want, and how much time you’re willing to spend managing the details.
Mobile Podcasting Setup: Sony ZV-1 II


Simple, clean, and hard to mess up.
Most people should start here. Not because it’s cheap, but because it gets you recording without the faff. A lot of “bad podcasts” aren’t bad because the ideas are weak. They’re bad because the audio is rough, the camera dies mid-take, or the setup takes so long you lose momentum before you even start.
The Sony ZV-1 II is the heart of this rig. Small, light, and designed to be friendly. People ask why not just use a phone. You can, but a dedicated camera gives you consistency. It also gives you better control when the room looks like a crime scene. The ZV-1 II’s larger sensor helps with that, and the lens is wide enough to work in small spaces without forcing you to sit on top of the camera.
You don’t need to go deep on picture profiles either. S-Log3 is there if you want to colour grade later, but most people should start with a normal profile and get the basics right: exposure, white balance, framing, and clean audio.
For power, treat it like you’re running a small production. Run the camera off a power bank and you stop worrying about batteries altogether. That one change takes stress out of the shoot, especially if you’re rolling long conversations.
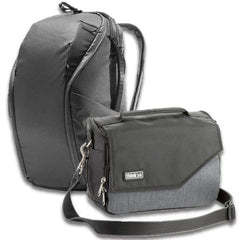
For audio, the DJI Mic Mini is the obvious win. It’s small, fast to deploy, and avoids the classic “we’ll fix it later” trap. You get clean speech, you get it straight into camera, and you don’t have to spend your night syncing. Clip it on, hit record, and move on.
This rig is for people who want a setup that encourages consistency. If you’re starting a podcast, doing client interviews, or creating content while travelling, this is the one that gets used.
Mobile Podcasting Setup 2: Canon R50V


Still mobile. Now you’re in charge.
This is where control starts to matter. You’re still packing light, still setting up quickly, but you’re no longer stuck with one lens and one look.
Switching to the Canon EOS R50 V is the big leap here. The sensor size jump helps, but the real upgrade is lens choice. You don’t realise how much lens flexibility matters until a client puts you in a cramped boardroom, or you’re shooting in a café with a messy background. Wide when you need space. Longer when you need to clean things up. That flexibility saves you.
Small details matter more at this level, too. A tally light sounds trivial until you’re running multiple takes, juggling angles, and trying to avoid the worst feeling in content: thinking you got it, then realising you weren’t recording.
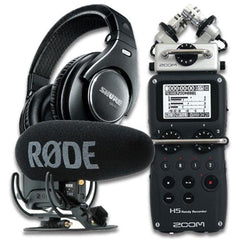
Audio is the other big leap. A proper mic like the RODE PodMic through a Zoom H6 gives you real control. Gain staging, monitoring, backup recording, and the ability to adapt as you grow. The PodMic doesn’t need phantom power, which keeps things simple, but the H6 gives you room to expand if you want to move to different mics later.
This is also the point where you should start caring about room sound. Hard floors, bare walls, and reflective glass will make even good mics sound rough. You don’t need to build a studio, but you should start thinking like a shooter. Put people closer to the mic. Keep the mic off the table if it’s picking up knocks. Use headphones. Do a quick test recording and listen back. Fix the problem before you roll.
Lighting at this level is about control, not brightness. A small LED can lift a face, clean up shadows, and make the whole image feel intentional. You don’t need to over-light. You just need to stop the overhead fluorescents from doing all the work.
This rig suits creators and small teams who publish regularly and want their content to look and sound consistent, even when the location is unpredictable.
Mobile Podcasting Setup 3: Nikon ZR


Workflow is king.
Once you hit the pro level, the game changes. It’s not just about quality. It’s about speed, reliability, and repeatable results.
A camera like the Nikon ZR gets you into full-frame territory, which gives you more flexibility in challenging light and more room in post. It’s also still compact enough to stay mobile, which matters if you’re shooting in real locations and not living in a studio.
The bigger shift here is how you handle production. This is where something like the RODECaster Video makes sense. If you’re producing weekly, doing branded content, running a podcast network, or filming live-style interviews, the ability to switch, manage audio, and record cleanly in one system saves time. It turns production into a process, not a scramble.
Audio steps up too. The RODE Procaster has more weight and presence. It’s the kind of difference that doesn’t scream at you on a phone speaker, but absolutely matters when people listen on proper headphones. It sounds confident. Less thin, more intentional.
Lighting follows the same logic. Compact fixtures like the Zhiyun X100 and X200 keep things mobile, but give you more grunt and control when you need it. More output means you can shape the light instead of just hoping it looks okay. You can place lights further back, soften them properly, and still get a clean exposure.
This setup is for people doing this constantly. Client work, branded content, interviews every week, or a podcast that has outgrown the lounge room. At this level, you’re not buying gear to look pro. You’re buying time back.
So where should you start?
If you’re just starting, go entry and get reps. Your first job is consistency, not perfection.
If you’re publishing regularly and you want control without losing speed, the mid-tier setup is the sweet spot. It’s the best balance of flexibility and simplicity.
If you’re producing constantly, or you’re getting paid to do it, the pro setup is about saving time and reducing risk. Fewer problems on set. Less fixing later. More predictable results.
Final thoughts
The real win with mobile podcasting isn’t just portability. It’s freedom.
Freedom to record where the story is, not where the studio is. Freedom to set up quickly, capture clean audio, and walk away with something you’re proud to publish.
You don’t need a perfect space. You don’t need a full studio. You just need a setup that works, and the discipline to keep it simple.