


Beauty Lighting: How to Combine Hard and Soft Light to Make Skin Pop
Beauty photography is often taught as if there are only two choices: soft light if you want the image to feel flattering, or hard light if you want it to feel dramatic and editorial.
In practice, the best beauty lighting usually needs both.
You need enough hard light to create shape, contrast and glossy highlights, but enough soft light to keep the skin controlled and the transitions clean. If the light is too soft, the face can look flat. If it is too hard, every texture point becomes louder than the expression, makeup or shape of the face.
That balance is what makes beauty photography pop.
For me, beauty lighting is not really about choosing hard or soft light. It is about knowing when to shape, when to fill, when to bounce, when to diffuse, and when to take light away.

What makes beauty photography pop?
A strong beauty image usually has three things working together: structure, highlight and clean skin tone.
Structure comes from shadow. If the face has no shadow, it usually has no shape. The cheekbones, jawline, brow and nose all need some sense of form, even in a very clean commercial beauty image.
Highlights give the image energy. The gloss on the cheekbone, the catchlight in the eye and the small specular reflections on the skin are often what make beauty photography feel more editorial and expensive.
Clean tone keeps the image controlled. You can have shape and shine, but if the lighting exaggerates every pore, line or texture point, the image can quickly become unkind.
This is why hard light and soft light both matter. Harder light gives you shape, contrast and sharper highlights. Softer light helps smooth tone, control skin texture and create a more flattering transition into shadow. The craft is in deciding how much of each the person in front of you needs.
Hard light vs soft light in beauty photography
Hard light comes from a smaller or more direct source. It gives you sharper shadow edges, stronger contrast and more obvious specular highlights. Used well, it can make skin feel glossy, graphic and modern. Used badly, it can make the face feel harsh very quickly.
Soft light comes from a larger source relative to the subject. It wraps more gently, creates smoother transitions and is usually more forgiving on skin. Used well, it keeps the image polished and controlled. Used too heavily, it can remove all the shape and leave the face looking flat.
The point is not to decide that one is better. The point is to understand what each one is doing.
If the image looks dull, it may need more shape or a harder accent. If the image looks harsh, it may need more fill, diffusion or bounce. If the image looks too open, it may not need another light at all. It may need negative fill or a flag to take light away.
Beauty dish vs softbox: which should you use?
A beauty dish and a softbox can both be used for beauty photography, but they solve different problems.
A beauty dish gives more shape, direction and punch. It sits between hard and soft light, which is why it is useful for beauty but also why it can be tricky. It can create beautiful highlights and face structure, but it needs careful placement, especially if the skin has texture or the face does not suit a more contrasty source.
A softbox gives a broader, smoother and more forgiving light. A large softbox close to the subject can create very clean skin tone and gentle transitions, but it may need negative fill, flags or a harder accent to stop the face becoming too flat.
In simple terms: use a beauty dish when you want more shape and punch, and use a softbox when you want smoother tone and softer transitions. In practice, I often want both kinds of thinking in the same image.
Do you need a grid on a beauty dish?
A beauty dish and a softbox can both be used for beauty photography, but they solve different problems.
A beauty dish gives more shape, direction and punch. It sits between hard and soft light, which is why it is useful for beauty but also why it can be tricky. It can create beautiful highlights and face structure, but it needs careful placement, especially if the skin has texture or the face does not suit a more contrasty source.
A softbox gives a broader, smoother and more forgiving light. A large softbox close to the subject can create very clean skin tone and gentle transitions, but it may need negative fill, flags or a harder accent to stop the face becoming too flat.
In simple terms: use a beauty dish when you want more shape and punch, and use a softbox when you want smoother tone and softer transitions. In practice, I often want both kinds of thinking in the same image.
Using softboxes, bounce and diffusion for beauty lighting
Soft light is usually the safer starting point in beauty photography, but it still needs intention.
A 4x6 softbox, a 2x3 softbox, a silk, a white wall, a V-flat and a bounce board will all create different versions of softness. They do not simply soften the light in the same way. They change spread, intensity, contrast and how much direction survives.
In our Georges studio, I often bounce light into white walls. On location, I am more likely to use bounce boards, polyboard or V-flats. Bounce can lift the shadows, make strobe feel more natural and stop the image from feeling over-lit, but the surface, distance and angle all matter.
I also use silks and fabrics a lot, especially as fill. For a recent beauty setup with Sienna, I bounced light off a white wall and then pushed it through a quarter-stop grid cloth. That fabric did not diffuse the light heavily, but it took the edge off while keeping some of the original character and direction.
That is an important distinction. Sometimes you want heavy diffusion. Sometimes you only want to soften the edge slightly while keeping the light alive.
Using a 4x6 softbox as a backlight
A 4x6 softbox is usually treated as a large key or fill source, but I often like using it directly behind the subject.
Placed behind the model, a 4x6 can wrap light around the face and shoulders, create separation and add atmosphere without relying on a traditional hair light. I tend not to use hair lights much in beauty because, for my taste, they often pull attention away from the face.
When the 4x6 is behind the subject, I might use a V-flat or polyboard to push some of that light back into the face. If the backlight is spilling too much into the lens or wrapping too aggressively, I will use black flags to cut it down.
The look is not created by the softbox alone. It comes from how much of that backlight you allow, return or remove.
Why does my flash look flat?
If your flash photography looks flat, the problem is usually not the flash itself. It is the lack of shape, direction or controlled shadow.
This happens when the light is too frontal, too evenly filled, or bouncing around the room without enough negative fill to bring back contrast. The image might be technically clean, but the face has no structure.
To fix flat flash in beauty photography, try changing one of four things:
- Move the key light off-axis so the face has more shape
- Reduce the fill so the shadows have more depth
- Add negative fill with a black flag or V-flat
- Use a more directional modifier, grid or reflector to control spill
Sometimes the answer is not adding another light. It is taking light away.
Negative fill, flags and nets
One of the biggest improvements photographers can make in beauty lighting is learning how to remove light rather than adding more.
Small black flags near the face can pull light away from a cheek, jawline or side of the face, creating more shape and separation. Larger flags can control edge light across the whole side of the body, especially when working with a big backlight or wrapping source. Nets are useful when you want to reduce intensity without killing the light completely.
This is where beauty lighting becomes much more precise. Light is shaped by what you turn on, but it is also shaped by what you block, soften, bounce and subtract.
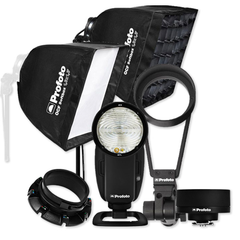
Profoto modifiers I use for beauty lighting

For the way I work, the most useful Profoto modifiers are the ones that let me make fast, specific decisions.
The Profoto Softlight Reflector, especially in white with a grid, is my preferred beauty dish-style tool when I want shape, control and a slightly cleaner character than silver.
The Profoto OCF Zoom Reflector is one of my favourite hard light tools because the rubberised zoom grip lets you quickly change the beam angle, intensity and character of the flash. I often use it as an accent, or occasionally as a key when I want a very high-contrast look.
A 4x6 softbox is useful not only as a large soft source, but also as a backlight when I want wrap, atmosphere and separation.
A Deep White XL Umbrella can be beautiful when I want fast, broad wrap, although it needs to be controlled because umbrellas can spill a lot.
Then there are the tools that do not feel as exciting but matter just as much: grids, flags, nets, bounce boards, V-flats, silks and diffusion fabrics. These are often what make the difference between a light that is simply on and a light that is actually doing what you need.
A clamshell setup you can try tonight
A good beauty lighting setup should let you control shape, fill and separation independently. Clamshell lighting is a useful place to start because it gives clean skin, strong catchlights and controlled shadows under the face.
Start with a white Profoto Softlight Reflector as your key light, slightly above the face and angled down with intention. If you have a grid, use it to keep the light controlled and stop it spilling everywhere.
Then add fill from underneath or just below the face. You might use a reflector, a small soft source, bounce from a white wall, a V-flat or light through a silk. The goal is not to remove all shadow, but to decide how deep the shadows should be.
From there, look at what needs to be removed. If the face is too open, bring in a black flag. If the backlight is wrapping too much, cut it. If the skin is too harsh, soften the fill. If the image is too flat, reduce the fill or add negative fill.
For separation, do not automatically reach for a hair light. Try placing a large 4x6 softbox behind the subject, letting it wrap, then controlling it with flags or bounce. This can create a more atmospheric edge while keeping attention on the face.
The setup does not need to be complicated. It just needs to give you control.
Learn beauty lighting hands-on at Georges Cameras
I have been rebuilding my beauty book recently, and a lot of that process has been about refining how I use lighting, creative direction, team, references and execution.
The next session in the series is Brief to Delivery: Shooting Photography Campaigns, which looks at what happens when portfolio work starts turning into paid creative jobs. I will be given a brief from a creative director that I have not seen beforehand, then I will have to respond to it live, which should be an interesting test of whether these tools and decisions line up with what a real brief asks for.
For a deeper technical lighting session, Practical Lighting: Creating Authenticity With Strobe at Georges Cameras in Chatswood will focus properly on hard light, soft light, bounce, silks, beauty dishes, flags, negative fill, backlight and the hands-on decisions that make a beauty image work.
Reading about lighting helps, but at some point you need to stand in the room, move the flag, change the fill and watch the face shift. That is where the image starts to pop.
